Adding news posts regularly will engage and generate trust towards participants. To add news:
- Navigate to Dashboard > Posts > Add New
- Fill up Title and write the content in the text area below. You can also set a “featured image” to display with the post.
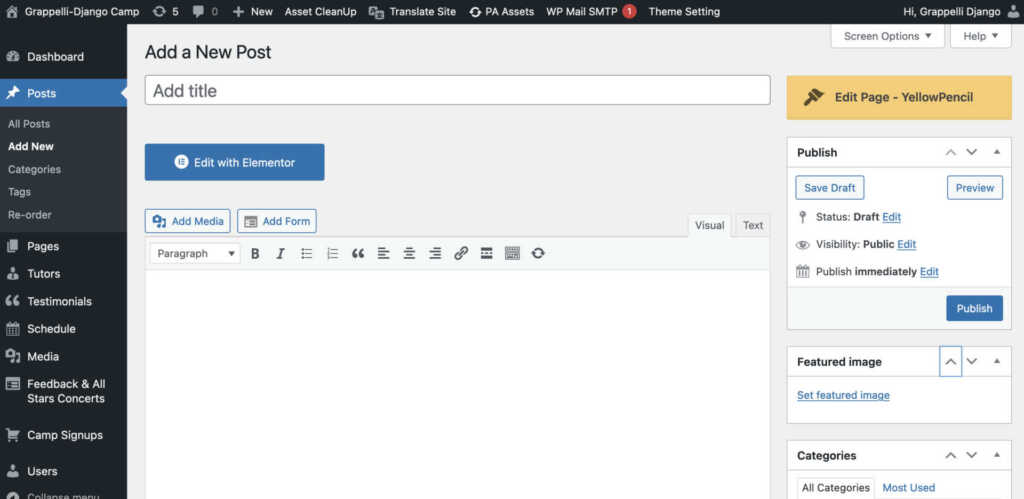
- Click “Publish” to finish
To edit an existing published post then navigate to Post > All Posts, find the desired publication and click on “edit”
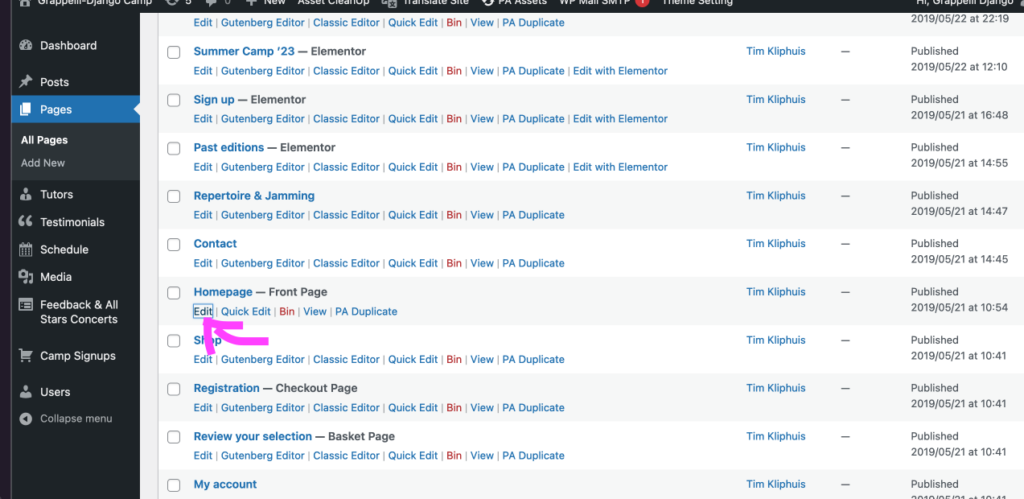
It is possible to add banners to homepage with an action button. For that navigate to Pages > All Pages. Then find “Homapage” and click on “Edit”
- This screen shows all the blocks that are shown in the homepage. It is possible to edit any by clicking on them. To add a banner click on the + button and a popup will show up. Scroll down and select “Full width button”

- Fill up all the fields and click Update. Then move to the desired position in the homepage.
- To publish the changes click on “Update”
Once a signup has been submitted a new “order” will be generated. An order contain reflects other relevant information as date, billing info, nº of bus tickets, t-shirts, nº of participants, etc..
Once the order is received its status will go either “On Hold” (if payment is via Bank Transfer) or “Processing” (if it was via Paypal). As well, the participant will receive an email telling his order is in processing/on hold.
Once the payment has been received correctly the order has to be “confirmed”. Then, the participant will receive a confirmation email. This last step is important in order to elaborate a list of participants as well for the participant in order to know that his registration has been processed correctly.
Check below “How to Process an Order” for further instructions.
UPDATE 4/01/24
Some orders might contain more than one attendee. For checking & download all attending students check here:
You can find all the received orders at Dashboard > Camp Signups > Received Orders
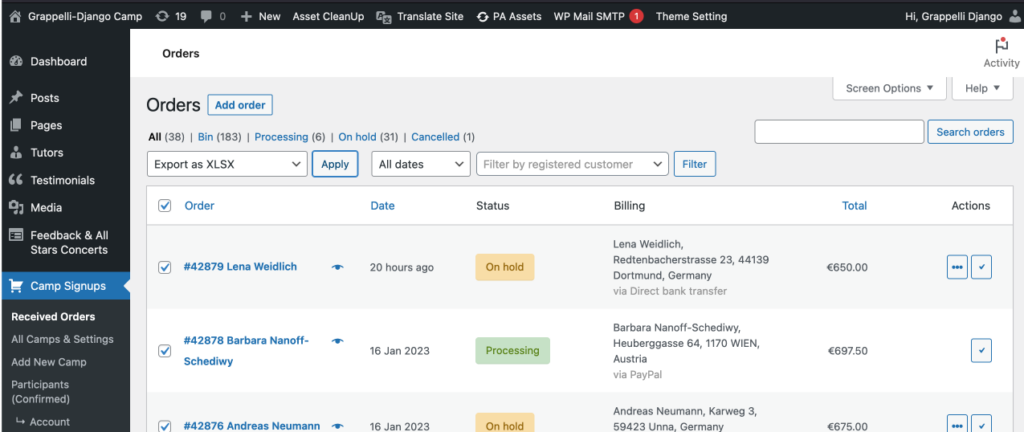
When a signup has arrived an order is created and set to “on hold” or “processing”. The first one is usually set for bank transfers and the second is for Paypal payments as the payment has been sent and it is just pending to be double-checked manually at the camp’s PayPal account. These are the steps to take to process a signup:
- On the left menu, go to Camp Signups > Received Orders
- Find the desired order. Let’s take this one for example:

- By clicking over the name of the participant it will lead to a detailed view of the order.
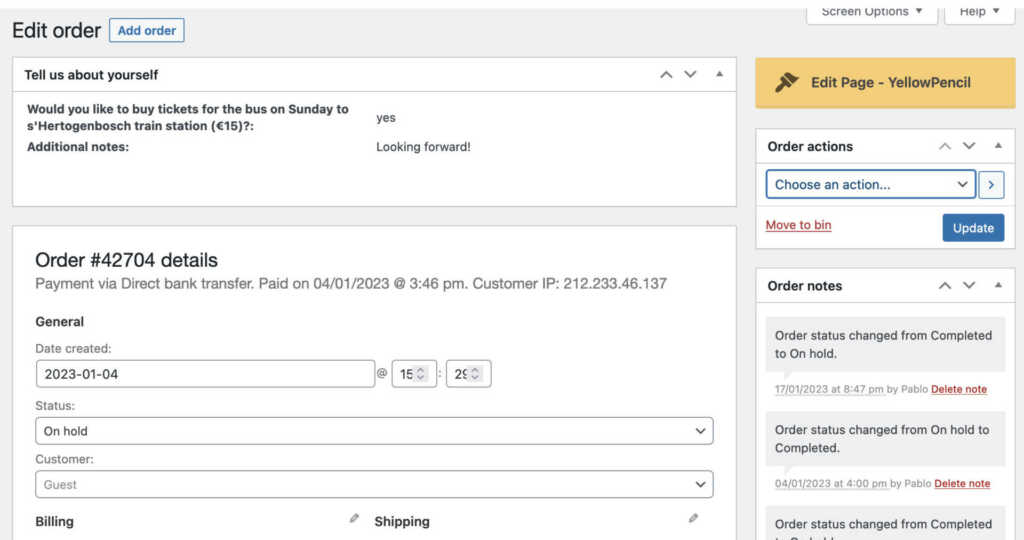
- Once the payment has been received correctly we have to update the “Status”. For that select from the “Status” dropdown “Completed” and click on “Update” on the right sidebar. Now the status will be saved and the participant will receive a final confirmation email.
- Tip: There is a quicker way to perform this action. From the “Received Orders” overview click on the button next to the desired participant as show in the image.

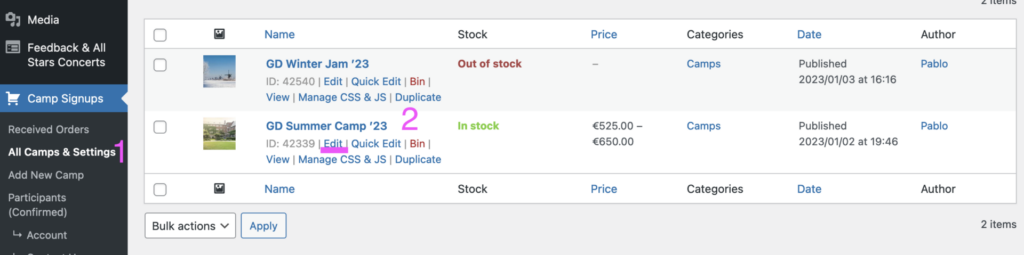
- Go to Dashboard, in the left menu navigate to Camp Signups > all Camps & Settings
- Click on the desired camp
- Scroll down to the “Product data” section. On the left sidebar, click on “Variations”. Then click on “Edit” for the desired room. Now you will see all the options for the selected room.

- Set the desired number in ” Stock Quantity” to change the room availability.
- The “Description” text box will display at the signup page the text associated to this room.
- Change the amount at “Regular Price” to update the pricing for the room.
To limit the amount of players by type:
- Go to Dashboard, in the left menu navigate to Camp Signups > Limit Type of Players
- There are currently 3 groups: bass, guitarists and melodic players. In case you don’t see them, check in “Low in Stock” or “Out of stock” tabs.
- To update stock click on the circular arrow button “Update STOCK”
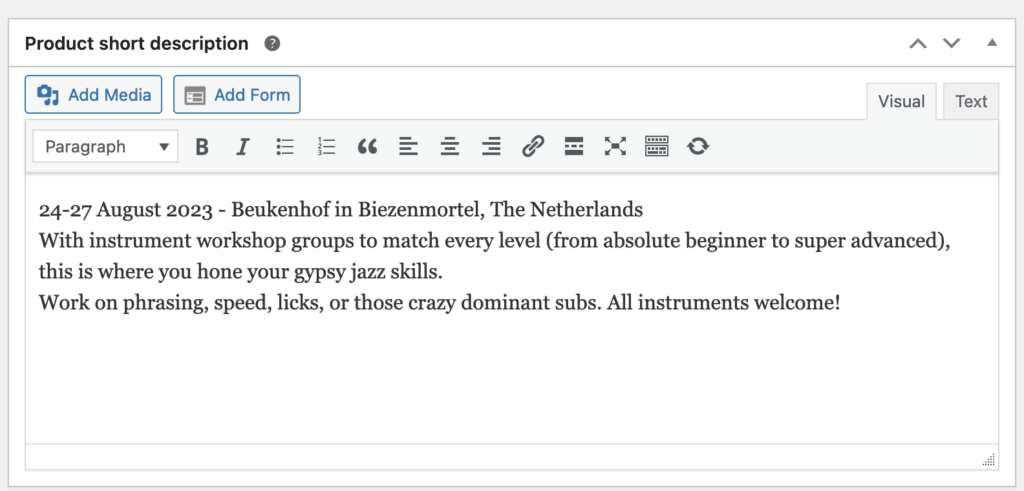
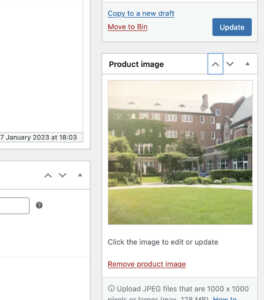
- Go to the Dashboard > Camp Signups > All Camps & Settings
- Click “edit” on the desired event/camp
- Scroll down the page to “Product Short Description” for changing the description text of the Camp. Do not use the “Product Description” at the top of the page.

- For changing the Camp picture: on the right sidebar, click on “Remove Product Image” and click “Set Product Image”.
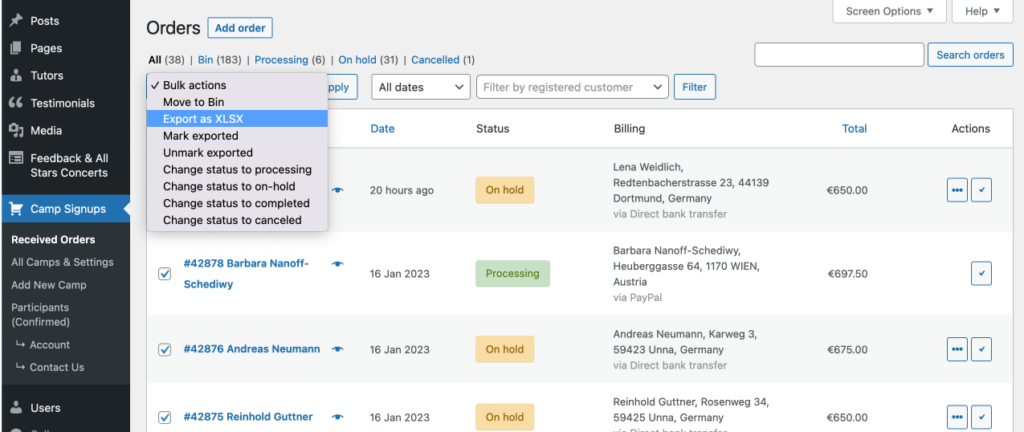
You can export a XLS file for each event which includes all order details. THIS DOESN’T INCLUDE ALL PARTICIPANTS, for that check the next section on How to export a list with all participants. This file includes billing info, bus tickets, patron contribution and T-shirts orders.
- Go to the Dashboard > Camp Signups > Received Orders
- Select all orders. Tip: To quickly select all orders on the page click on the very first left checkbox next “Order” at the top row.
- On the dropdown menu, select “Export as XLSX” and then click “Apply”. An xlsx file will download with the selected orders.
You can export a CSV file for each event which includes all participant details.
The CSV file can be opened using any spreadsheet program such as Microsoft Excel or Google Sheets where the data can be sorted, filtered and analyzed.
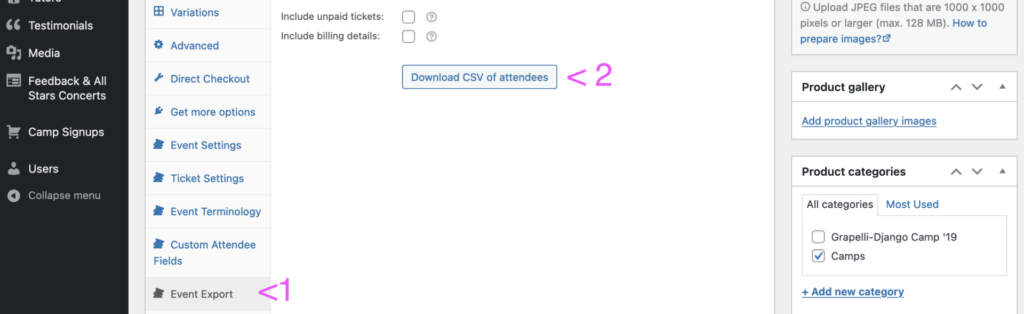
- Go to the Dashboard > Camp Signups > All Camps & Settings
- Click “edit” on the desired event/camp
- Scroll down the page and click on “Event Export”. Then click on “Download CSV of attendees”.
Navigate to Tutors > Add New Tutor
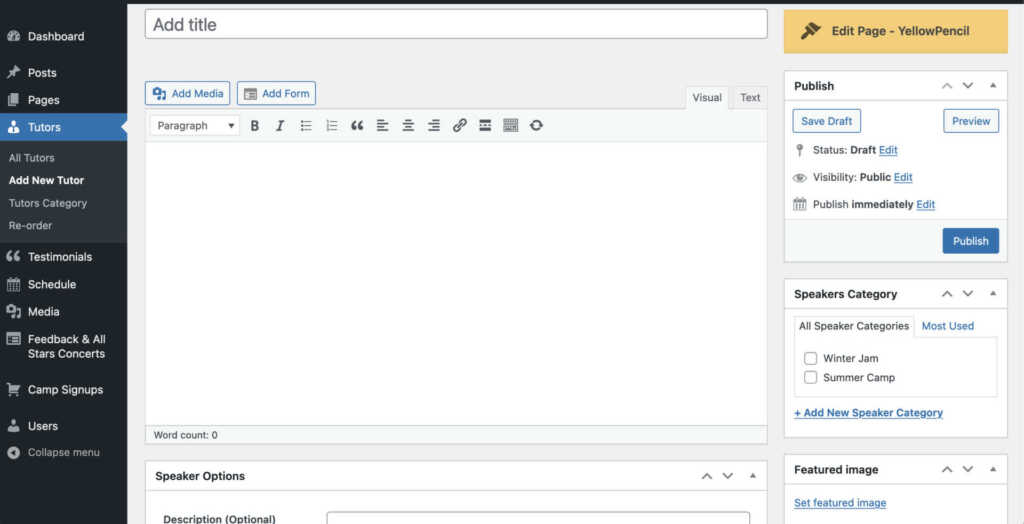
- Fill the following fields:
- Title: name of the tutor
- Description: biography
- Speaker category: set whether to show up at the winter jam or the summer camp. It is possible to select both. If none is selected it won’t display anywhere.
- Feature Image: set an profile picture for the tutor. It is recommended a square picture.
- Fill Speaker Options
- Once finished click on “Publish”
- Navigate to Tutors > All Tutors
- Find the desired tutor and click “edit”
- Once finished updating all details click on “update”
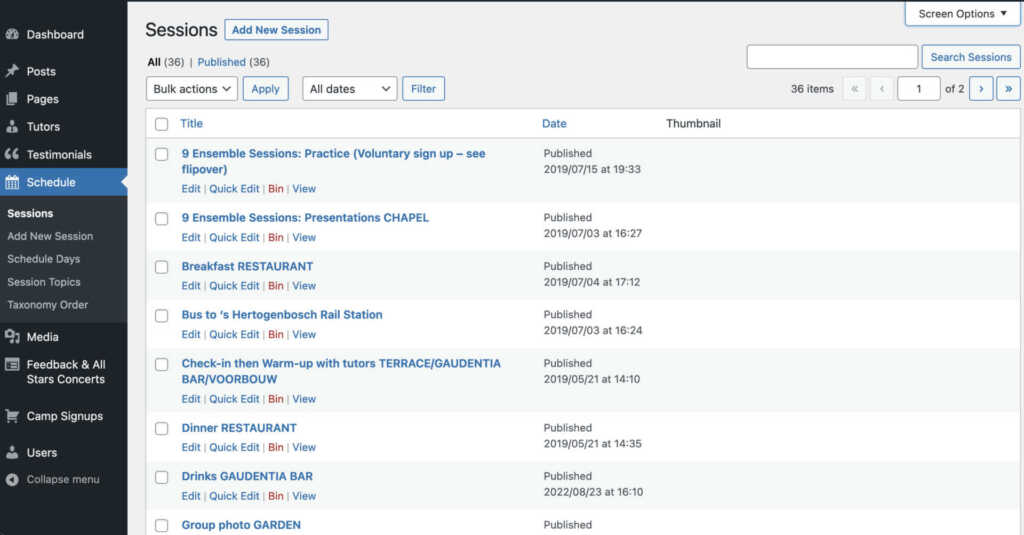
The website features a rich and interactive schedule. This allows to schedule days and create sessions (lessons or activities) and link them to the already existing tutors. All created sessions can be found here:
Due website limitations it is only possible to have one schedule running per camp. In the next section we will have a look on how to setup a new schedule for a camp.
- Let’s start by setting the correct days. For that navigate to Schedule > Schedule days. Let’s edit the first day:
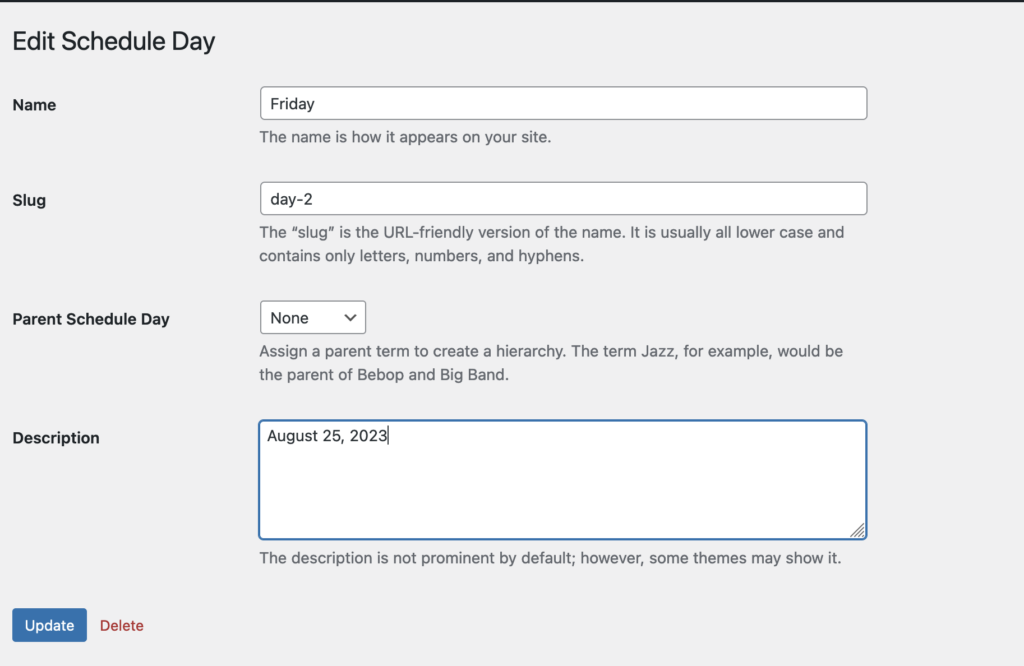
- In this case, the only necessary change is to set the correct date. Then, click on “Update”.
- Update the rest of the days. It is possible to delete/create other days if needed.
- Once all the days are scheduled, we navigate to Schedule > Sessions
- To create a new session navigate to Schedule > Add New Session. You will be presented with the following screen:
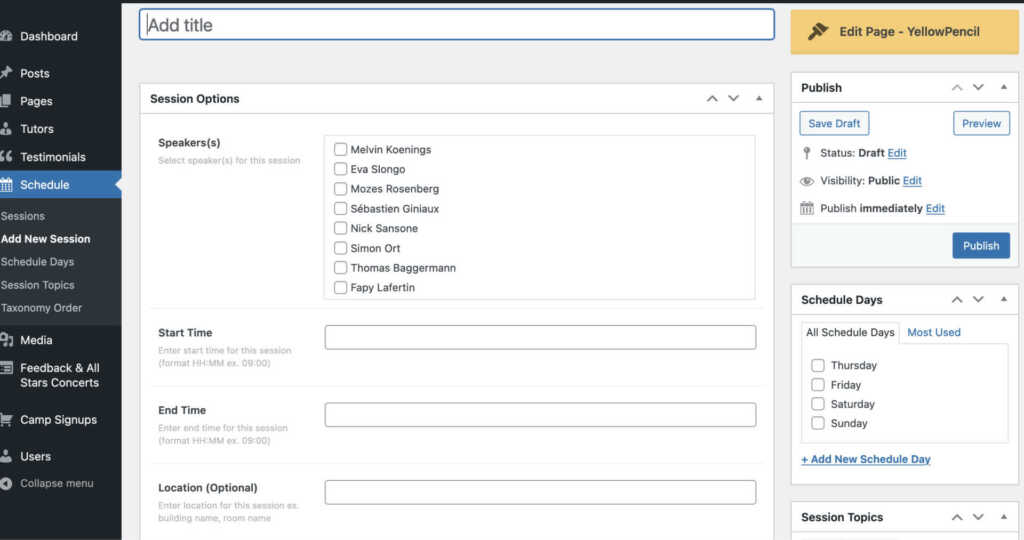
- Now this are the fields that need to be completed:
- Add Title: main title of the activity
- Speakers: select the tutors involved in the activity
- Start/End time
- Location: Set the appropriate room for this activity
- Schedule Days: set one or multiple days for the activity
- Session Topics: Set the desired category for the activity. It is possible to create/change information about Session Topics. For that navigate to Schedule > Session Topics.
- We can also choose to update existing sessions. For that navigate to Schedule > Sessions. Then look for the desired session and click on “Edit”. That will bring you to a new screen where you can adjust all the necessary information.
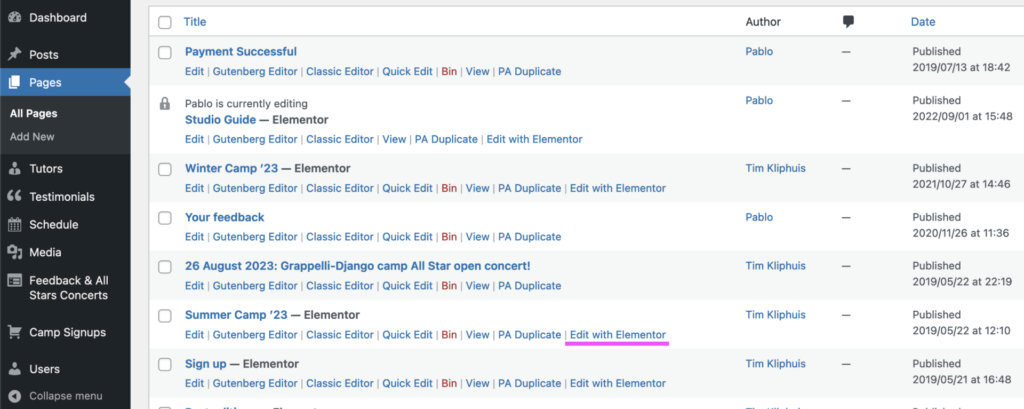
- Now we need to update the corresponding camp’s page to display the schedule. For that we navigate on the left menu to “Pages”, find “Summer Camp ’23” and below the title click on “Edit with Elementor”
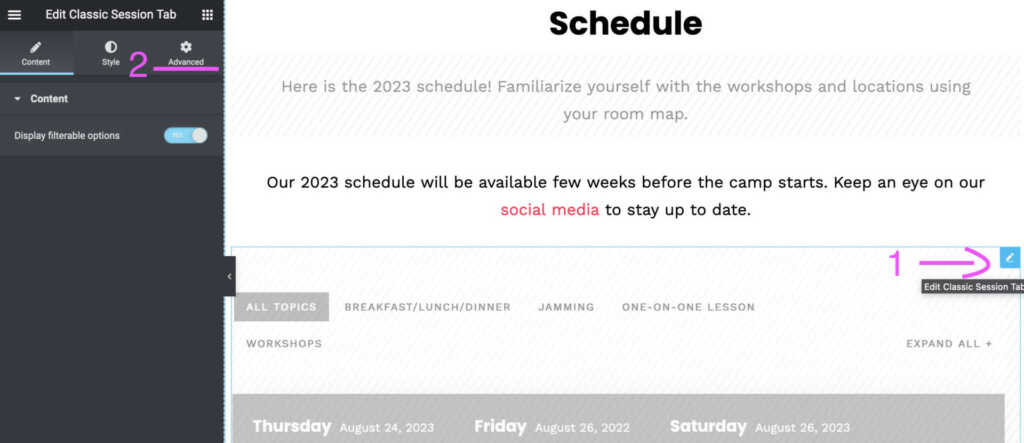
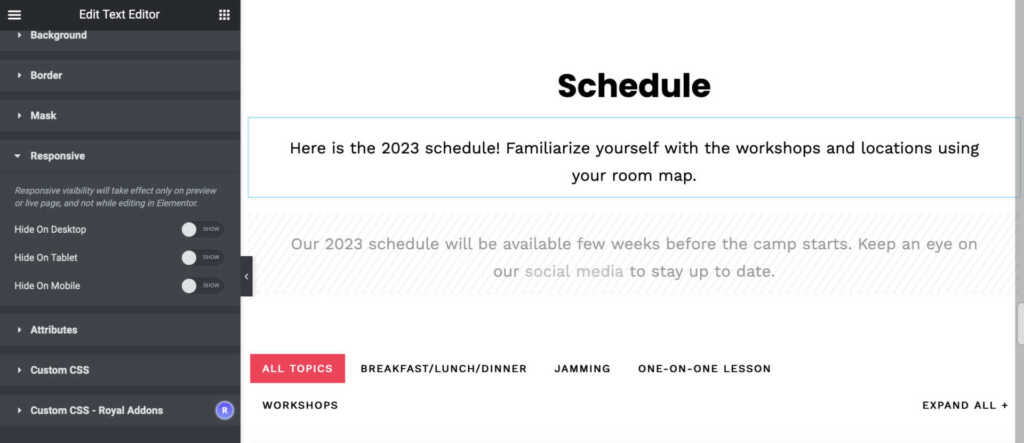
- Now we need “unhide” the schedule. Scroll down to the schedule section. Click on the blue edit button of the schedule widget and navigate to “Advanced”
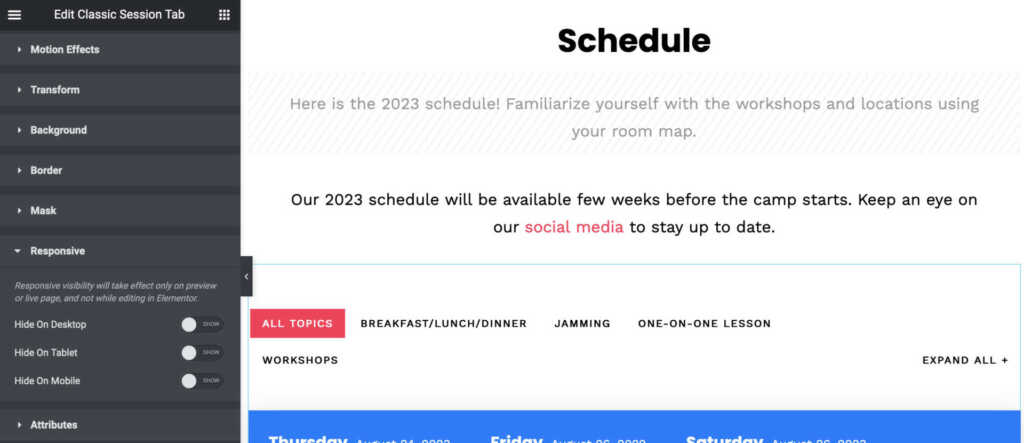
- Scroll down to the “Responsive” section and toggle off Hide on Desktop, Tablet & Mobile. Now the schedule should appear colourful in the right part of screen.
- Now, we are going to hide the upcoming text by doing the same trick. We also unhide the text above. It should look like this:
- Of course, it is possible to change the content of the text in the left sidebar.
- Click on the green button “Update” to publish the changes.
- Lastly, we need to deactivate the schedule in the Winter Jam Camp. As the system only allows one schedule running in the website. Otherwise the current camp schedule will show up incorrectly in the other camp. For that you have to navigate to the Winter Jam Page and repeat the steps above but in reverse.
See above “Homepage, news & alerts banners”
To change date, location or other text from the homepage slides:
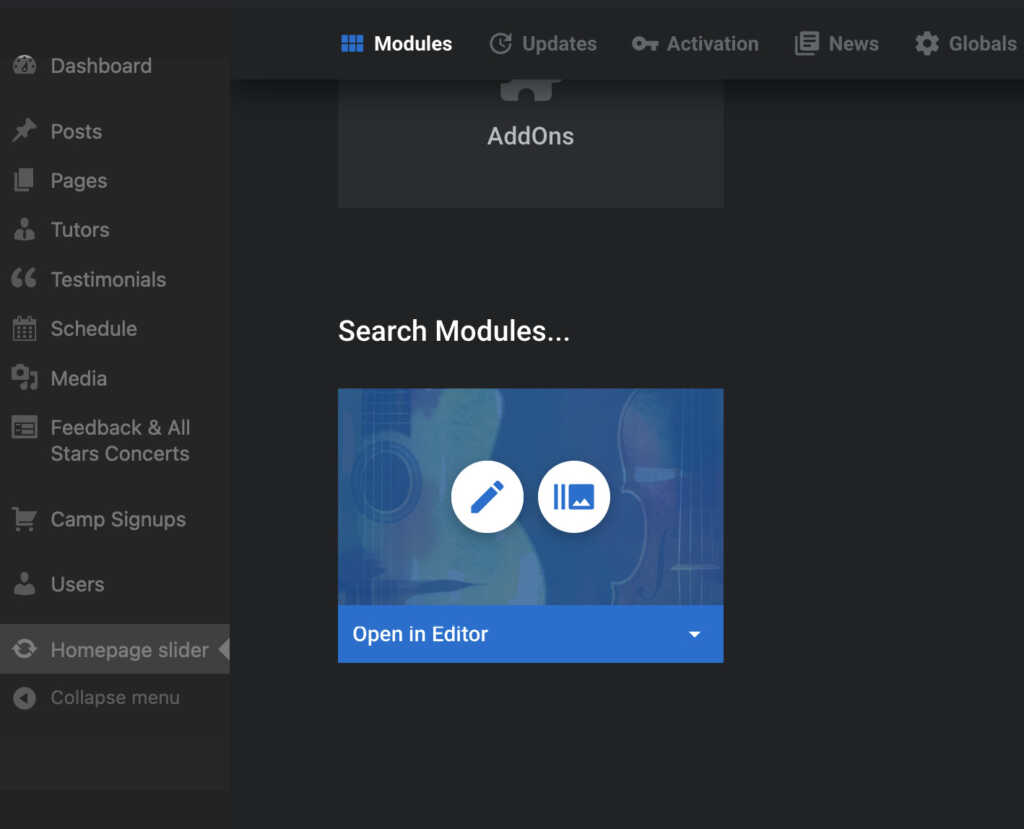
- To edit the homepage slider navigate to Homepage Slider. Scroll down to the homepage slider and click on “Open in Editor”

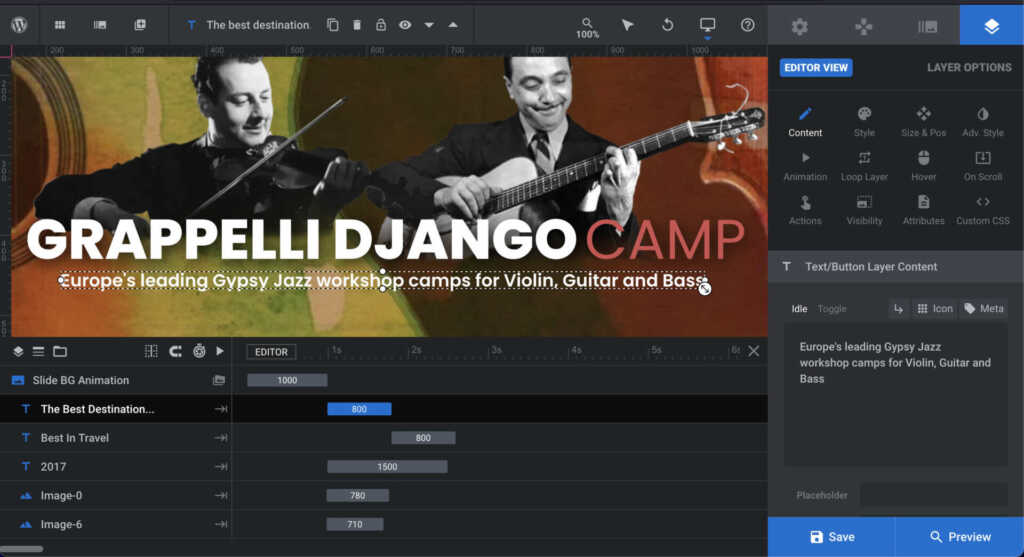
- Once in the editor it will appear the opening slide. When changing text try not to move the text out of position. If that happens, click on “undo” on the top bar or hit ctrl-z /cmd-z
- To edit other slides click on the slide selection button and choose the desired one:
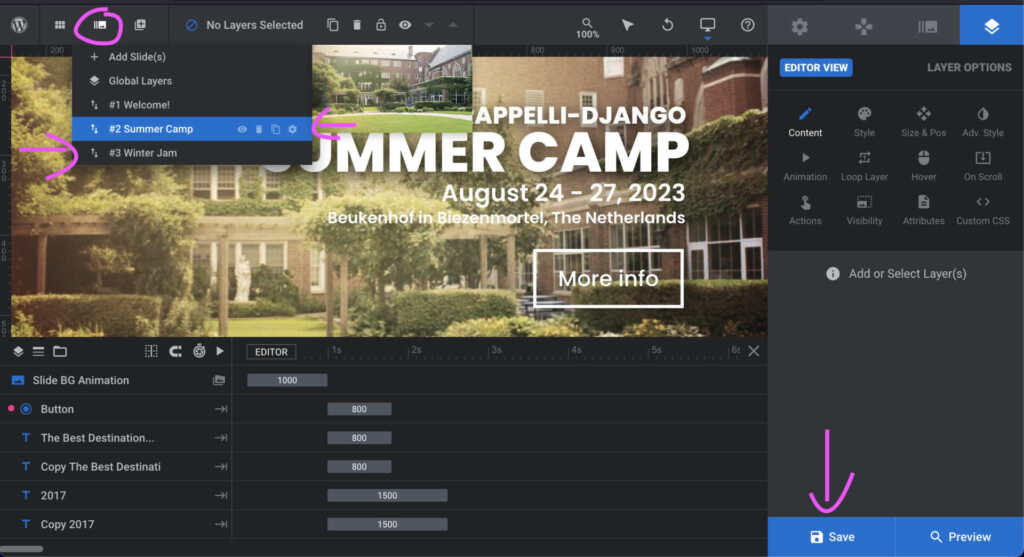
- When finished, click on “Save”
Both camp pages are created using Elementor, which is an intuitive and visual website composer. You can edit each section by clicking in each widget.
- Navigate to Pages > All Pages and find Summercamp ’23 or Winter Jam ’23 Pages. Then click on “Edit with Elementor”
- Make changes and when finish click update.
This checklist will serve as a quick guide on how to prepare the website for an upcoming camp. For detailed instructions on how to do each step please check in this FAQ. These are the steps:
1. Clear up existing orders here. You can export previous ones as means of backup.
2. Adjust title, room availability, prices and text description at “Camp Settings”
3. Update cancellation text/dates here
4. Adjust availability by type of player here
5. Update both camps pages. For example, if preparing for open summer camp, set first a message in winter camp telling that “registration for winter camp are currently closed”. Also disable/hide sign up button as well disable/hide the schedule widget. Then, repeat this steps but in reverse with the summer camp page.
6. Update top right button with the right link to the camp page. For that click on “Customize” at the top bar. Go to Navigation > General, scroll down and paste the right link at “Get Tickets”
7. Add/Update text and link at frontpage alert banner.
1. Navigate to Camp Settings > Checkout & Register Editor
2. Click on “Additional Fields” tab.
3. Search for field “bus_sunday” or “t-shirts” and click “edit”
4. Change values
5. Click on “update values”
6. Click on “save changes”
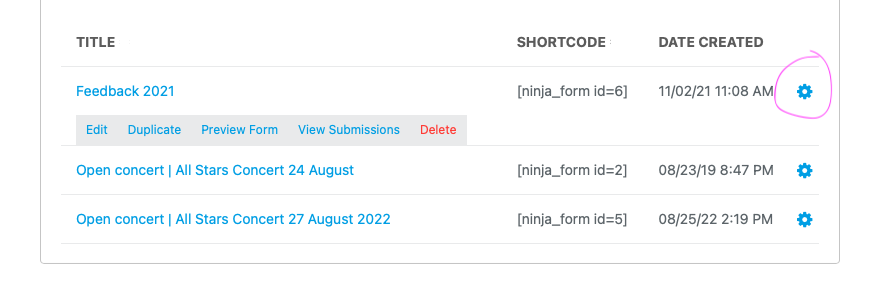
- On the dashboard, click on “Open Concert & Feedback”
- Now, in this page we can see all Feedback & Open Concert forms stored in the website. In order to save time we are going to duplicate the previous year feedback form. To do that, click on the little wheel next to Feedback form 202(1) and then, click on “duplicate”
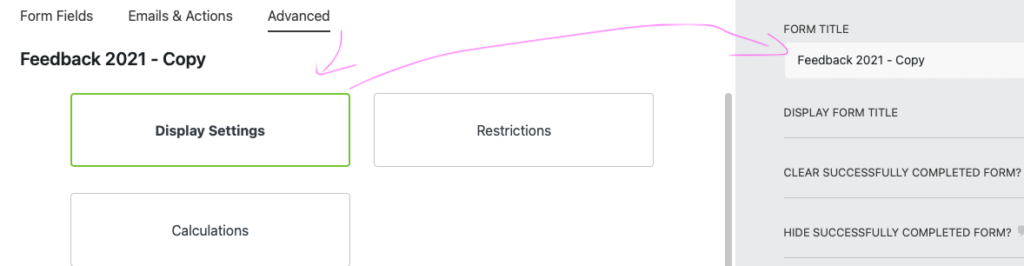
- Then, click on the duplicated new version to enter in the editor.
- Once we are in the editor, make the desired changes.
- Lastly, click in “Advanced” then “Display Settings” and update the form’s title
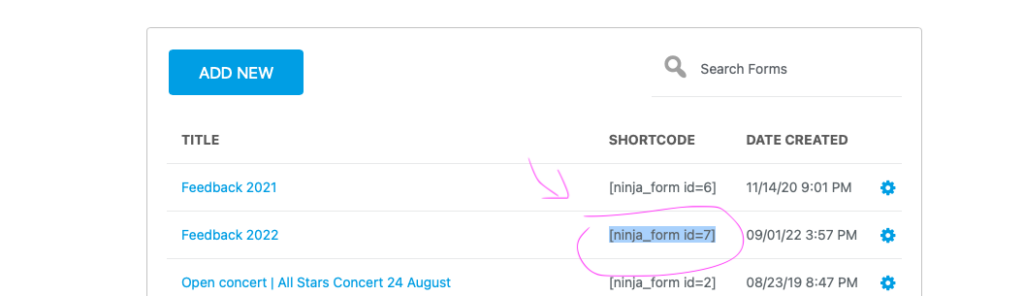
- Then, on the top right of the page, click on “Publish” and after the changes are saved close the editor (top right of the page)
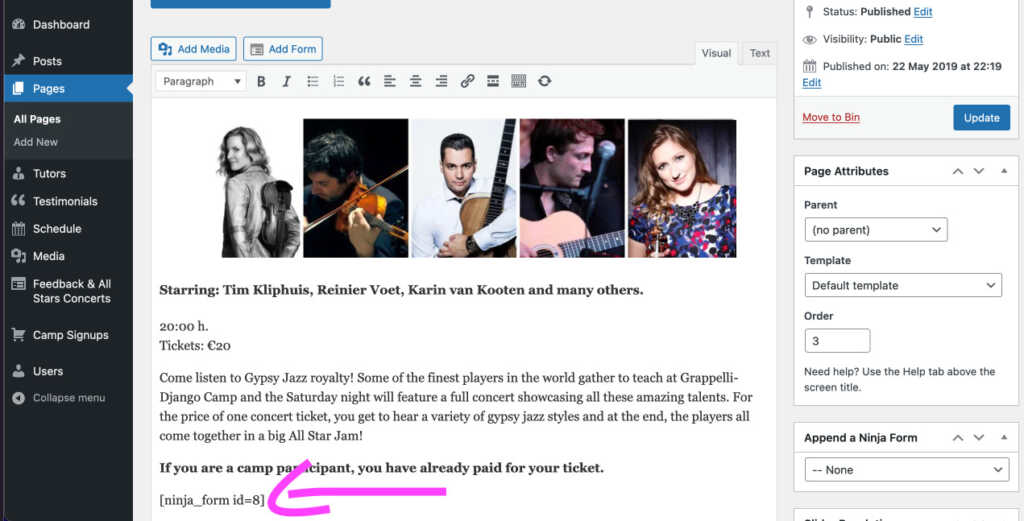
- Now, select and copy the form’s shortcode:
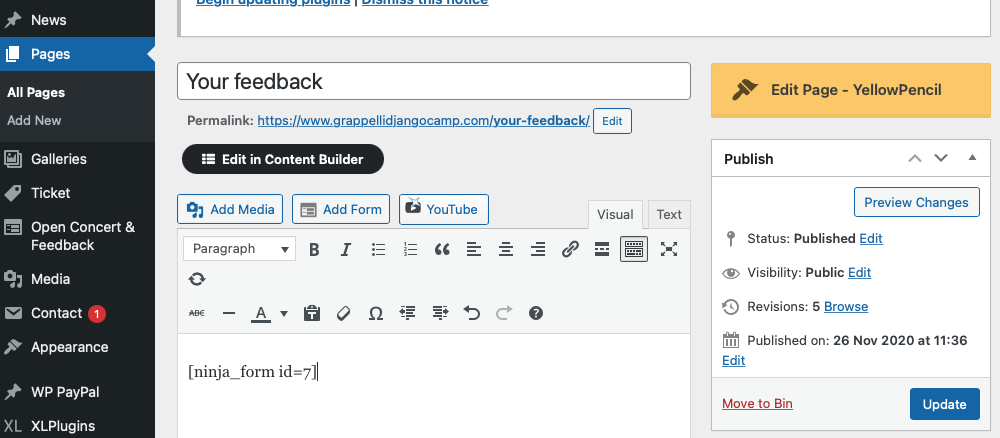
- Now, on the left admin menu, click on “Pages”
- Search and edit “Your Feedback” page
- Copy and paste the shortcode and click on “update”
- Now, just copy the page web address and share with your students!
You can find any submissions to the form here:
Select all the submissions and select “Export”. At button of the page you can set “Show 50” to enable seeing & exporting more submissions at once,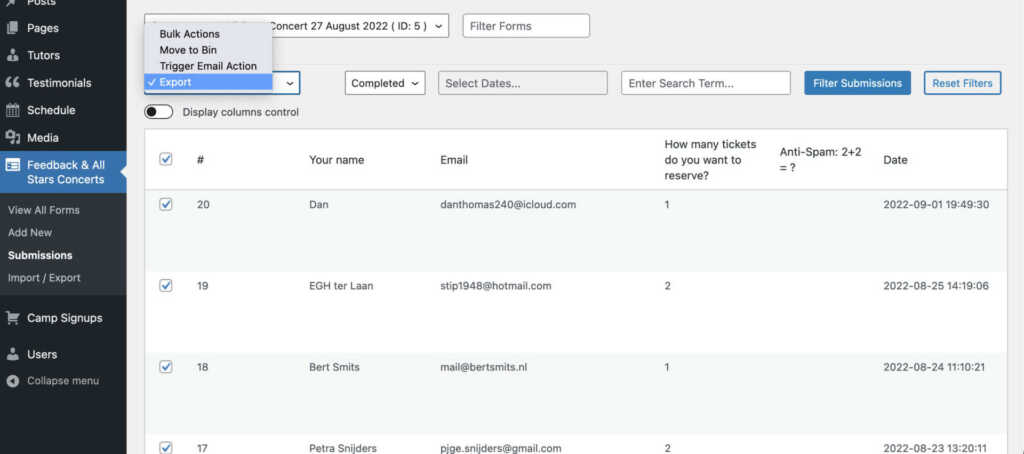
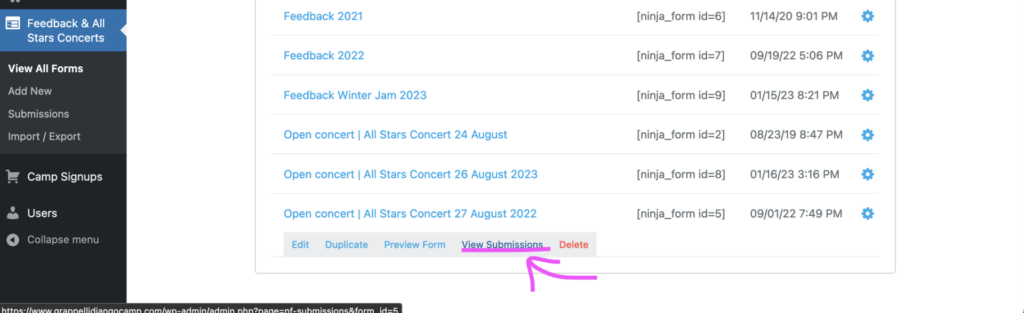
- On the dashboard, click on “Feedback & All Stars Concerts”
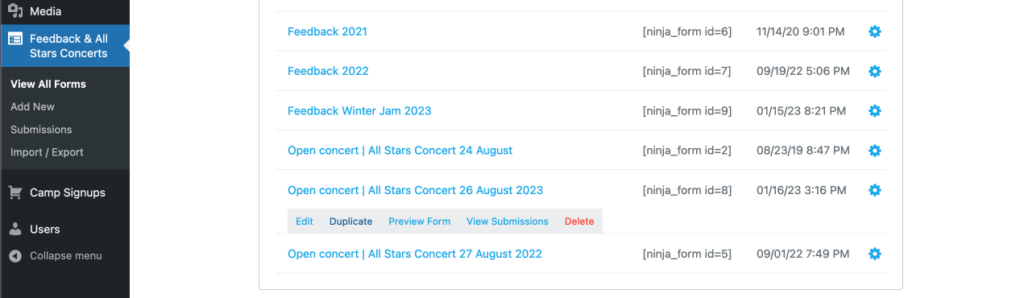
- Now, in this page we can see all Feedback & All Stars Concerts forms stored in the website. In order to save time we are going to duplicate the previous year feedback form. To do that, click on the little wheel next to Open Concert |All Stars Concert form 202(3). Then click on “duplicate”
- A new duplicated & empty version has been created. Then, click on the duplicated new version to enter in the editor.
- Once we are in the editor, make any desired changes.
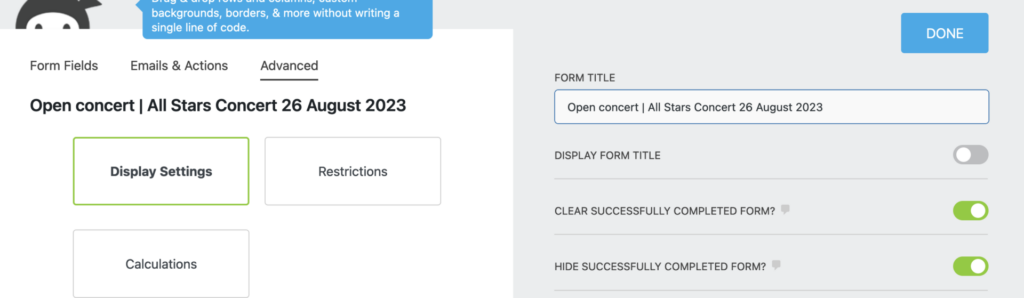
- Lastly, on the top menu, click in “Advanced” then “Display Settings” and update the form’s title
- Then, on the top right of the page, click on “Publish” and after the changes are saved close the editor (top right of the page)
- Now, select and copy the form’s shortcode:
- Now, on the left admin menu, click on “Pages”
- Search and edit “All Stars” page
- Copy and paste the short-code, update the page title (if necessary) and click on “update”
You can find any submissions to the form here:
Select all the submissions and select “Export”. At button of the page you can set “Show 50” to enable seeing & exporting more submissions at once,